
Join the BusinessForYou.Com
affiliate program!
FreeMailer2000 When you sign-up for Free, you will get your very own personalized FreeMailer2000 website along with your Unique URL. When someone signs-up from your FreeMailer2000 website, they become your First Level Downline. Similarly, when someone else signs-up from their Unique URL, they become your Second Level Downline and so on till 15 Levels. The trade off here is very light, only 14 people are able to send email to you in return.
Click here for information about webrings mastered by fjd1.com Webings are a great way to surf the web by topic, and a good method of getting your pages noticed for webmasters.
Trillium University maintains an archive at Ware.netfirms.com for software (and links to downloads) which you might find benificial.


If you need professional help, send me an e-mail describing your needs and how to best contact you. Sincerely,
F. Davies
fjdavies@yahoo.com
(360) 352-0242
ICQ 43536012
2. Designing your site continued. Click here for the previous lesson. From our last lesson we had a web page entitled index.html with the following code: Here is our previous example as we left it:<!DOCTYPE HTML PUBLIC "-//W3C//DTD HTML 4.01 Transitional//EN" "http://www.w3.org/TR/html4/loose.dtd">
Which parsed to look like this:
<html>
<head>
<title> My first html page, Hello World </title>
</head>
<body>
& Hello
W o r l d
<br />
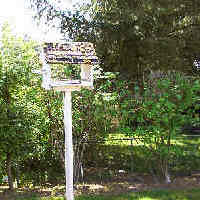
<a href ="another.html"> <img src="images/myphoto.jpg" width="150" height="150"
alt="My bird feeder."
border="0" />
</a>
<br />
<a href ="another.html">"Me" <Too></a>
</body>
</html>
& Hello W o r l d
Suppose we would like picture to be centered from left to right on the page. To center an object, text, or image, or a group of such things, we will a pair of center tags. That which they enclose will be centered. It is very important to use these properly as an error in them can cause a page to be parsed as a blank white page with some browsers. You must have not just a starting tag but a closing tag even if at the very end of your documents body. Here is our link and picture again, enclosed by center tags now:
"Me" <Too>& Hello
Now, just your image is centered as shown below:
W o r l d
<br />
<center>
<a href ="another.html"> <img src="images/myphoto.jpg" width="150" height="150"
alt="My bird feeder."
border="0" />
</a>
</center>
<br />
<a href ="another.html">"Me" <Too></a>
As we continue here, we will generally show only the portion of the code which is of interest. Let's turn our attention now to our first line of text, the Hello World we typed in earlier. There are six heading tag pairs which we can use to emphasize our headings and subheadings and the like. Six different sizes of text are associated with them, and a line break is automatic after the closing tags so you do not need to include a break tag to get to the next line. They are ordered in size from 1 being the largest to 6 being the smallest and it is worth noting that the search engines do pay attention to them as apart from regular text. (Wise and proper use of headdings may improve your rankings on the search pages.) Here are all six heading tag pair, each enclosing our Hello World text:
& Hello W o r l d
"Me" <Too>
<h1>
This should parse similar to what is shown below where these are in order from size one through size siz the smallest.
& Hello
W o r l d
</h1>
<h2>
& Hello
W o r l d
</h2>
<h3>
& Hello
W o r l d
</h3>
<h4>
& Hello
W o r l d
</h4>
<h5>
& Hello
W o r l d
</h5>
<h6>
& Hello
W o r l d
</h6>
& Hello W o r l d
Sometimes you may wish to have some portion of text show up exactly as it is typed, complete with extra spaces and breaking to new lines exactly as it was typed in. Without this pre tag pair, text is handled in a very automatic way, changing dynamicly as the user resizes a page, (to make everything fit in the window as best as possible.) Here is how you would use them if you were enclosing this paragraph. Note also that the text generaly looks like it was typed on an old typewriter, depending on your browser settings.
& Hello W o r l d
& Hello W o r l d
& Hello W o r l d
& Hello W o r l d
& Hello W o r l d
<pre>
Sometimes you may wish to have some portion of text show up
exactly as it is typed, complete with extra spaces and breaking to
new lines exactly as it was typed in. Without this pre tag pair,
text is handled in a very automatic way, changing dynamicly as the
user resizes a page, (to make everything fit in the window as best as
possible.) Here is how you would use them if you were enclosing this
paragraph. Note also that the text generaly looks like it was typed on
an old typewriter, depending on your browser settings.
</pre>
Note that it parses below just like it written above:By removing the pre tags you can see how your browser adjusts the lengths of lines and as you try draging the edge of your window you will note that the text area adjusts to present all the text as best it can. Here is the exactly the same text block, except this time, parsed without the pre tags.
 Sometimes you may wish to have some portion of text show up
exactly as it is typed, complete with extra spaces and breaking to
new lines exactly as it was typed in. Without this pre tag pair,
text is handled in a very automatic way, changing dynamicly as the
user resizes a page, (to make everything fit in the window as best as
possible.) Here is how you would use them if you were enclosing this
paragraph. Note also that the text generaly looks like it was typed on
an old typewriter, depending on your browser settings.
There are also tags to make the text bold or italicized or small or big as illustrated in the following code:This line is just plain ol' text.
Below is the parsed text:
<b>Enclosed within the bold tag.</b>
<i>Enclosed within the italic tag.</i>
<small>Enclosed within the small tag.</small>
<big>Enclosed within the big tag.</big>
<big><b><i>
Enclosed within big, bold and italic tags.
</big></b></i>
This line is just plain ol' text.
Our style sheet here may be over riding things a bit, so if the results seem less than obvious, try it yourself on your own pages. In fact, that is exactly what you should be doing, testing out every thing for yourself to see if it works as planned before you commit to creating a massively complex document. Try adding each of these tags to your practice pages. Later, you can use them for reference as you create more pages. I often refer to pages I have written knowing that some effect or gadget exists there and is working fine. Two more which are quite handy are the subscript tag pair and the superscript tag pair. They are used to move characters up just a little bit or down just a little bit, and when combined with the small tag pair work great for expressing equations, molecules, and things such as number look just a bit more trick. Here is the code for three examples, each using one of these tags, and all having the small tag nested inside:
Enclosed within the bold tag.
Enclosed within the italic tag.
Enclosed within the small tag.
Enclosed within the big tag.
Enclosed within big, bold and italic tags.E=mc<sup><small>2</small></sup>
After being parsed we can see the result below: (Yes, you may have notice that I have added a break tag now and then to make the examples a bit easier to read while I excluded it from the code also to make it less cluttered. If your examples all wind up on a single line, adding a few breaks will put things on their own lines.)
H<sub><small>2</small></sub>O
1<sup><small>st</small></sup>
E=mc2
Here are another three for the teletype effect, the underlining of text and strike through of text.
H2O
1st
<tt>This is parsed using the teletype tag.</tt>
Your browser handels them like this:
<u>This text is underlined.</u>
<s>This tag causes text to have a line stuck through it.</s>
This is parsed using the teletype tag.
Designs and diagrams may also be represented using the pre tag to align things the old fashioned way and mimic the character artwork dating back tothe invention of the typewriter. Here is the code for equation for caffine, commonly found substance in webmasters:
This text is underlined.
This tag causes text to have a line stuck through it.
And here is how it might parse for you:
<pre> CH3 | O=C---N / \ H3C-N C=O \ / C===C | \ | N-CH3 | / N===C | H </pre>And here is how it might look without the pre tags:
CH3 | O=C---N / \ H3C-N C=O \ / C===C | \ | N-CH3 | / N===C | HEven adding breaks after each line falls short of correct as all the multiple spaces are reduced down to single spaces. This code still will result in a collapsed diagram:
CH3 | O=C---N / \ H3C-N C=O \ / C===C | \ | N-CH3 | / N===C | H Note how everything has moved to the left still in this parse:
<pre> CH3<br /> |<br /> O=C---N<br /> / \<br /> H3C-N C=O<br /> \ /<br /> C===C<br /> | \<br /> | N-CH3<br /> | /<br /> N===C<br /> |<br /> H<br /> </pre>Again, it is important to try these out yourself. Remember to neatly nest tags inside each other, and this means that the closing tags are in the opposite order as the opening tags were. You may also notice how forgiving this language is in that many of the browsers will ignore (by design) anything they do not understand. They say that content is King, and you now have enough information and knowledge to prepare a basic web page with images and text, so begin now to work on your content, applying all the rules for english grammer and spelling you learned as a child to the job at hand. if in a hurry, you could skip ahead and upload your pages now, or go onto the next lesson where we will introduce some means of adding color to your pages. Click here to proceed to Web Page Design Lesson Number Four.
CH3
|
O=C---N
/ \
H3C-N C=O
\ /
C===C
| \
| N-CH3
| /
N===C
|
H


